|
Crow pose is one of my favorite arm balances and is accessible to just about anyone with a lot of patience and practice!!! Before we fly here are some of the overall benefits of inversions and arm balances in yoga! Free Spirit -Sense of Adventure -Inner Child Conquer Challenges -Address fears -One step at a time (not rushing the process) Strength Building -Builds lean muscles with help the metabolism -Body areas that gain muscle are core, glutes, back, shoulders and arms Medicinal -Decompresses the spine -Improved Circulation -Boost digestion, metabolic and endocrine systems -Brings balance to the brain -Brings both a sense of joy and calm from the change in perspective and addressing of fears Now let's talk more about Crow!If you have a belt, yoga strap, or even a bathrobe tie- grab it! Notice the points where CCYOGA teacher, Sarah Tomko, is touching in the picture below (the middle of her shoulder girdle). Make a loop and knot it at that distance to wrap around just above your elbows. Hold low plank for 3-5 breathes to up dog for 3-5 breathes a few times. I usually do the the low plank on my knees!. Also, notice the difference in Sarah's shoulders in the bottom two photos in this first photo collage!  Once you've built a bit of warmth in your arms and shoulders from the chaturangas and upward facing dogs. Move into some wrist stretches. The two collages below show the stages you may move through over weeks and months of practice. Look at the collage below. Take 5 breaths in one of the variations with the back of you hands on the mat with your finger tips facing your knees. You may need to stay with elbows very bent and knees very close to fingers for some time. As your wrists begin to open a bit you will start to straighten your elbows and slide your knees back on your mat. Eventually...EVENTUALLY...DON'T RUSH THE PROCESS... you will come into plank pose with your hands in this position.  After 5 breathes gently release your hands and switch to the position shown below with palm down and finger tips towards knee. Again, don't rush the process to move into the fullest expression! You may choose to alternate between the two hand position stretches (5 breaths palms up and 5 breaths palms down) several times.  Now you are ready to move into strength building for crow pose. Notice in the collage below that Sarah's knees are on the outside of her upper arms that are no wider than shoulder distance. Also notice that her gaze is forward (this is SUPER important) so that she doesn't go rolling into a front somersault. Once you have your hands and shoulders set, first lift one foot off the floor up towards you bum for 5 breaths. Then the other foot lifts for 5 breaths. Then you may feel inspired to lift both feet up to your bum to fly!!!! Breathe!!!! 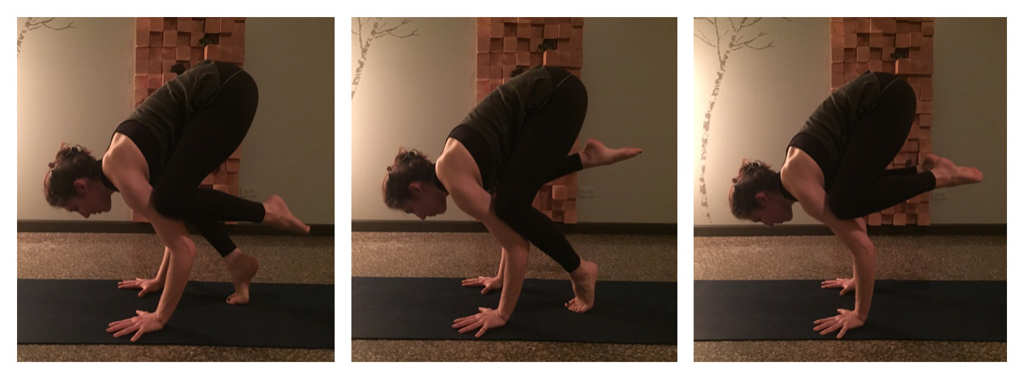 Another variation (the collage below) is to have the back of your knees on the back of your upper arms and begin straighten your arms to into Crane Pose. Sarah is almost there!  Remember to breathe! Otherwise you are doing stupid human tricks instead of yoga! :) Listen to your body (not your EGO) and honor when and where is stays to stop in each of these steps to flying in Crow Pose. If you share your process on social media we'd love it if you would tag us @cc360denver
0 Comments
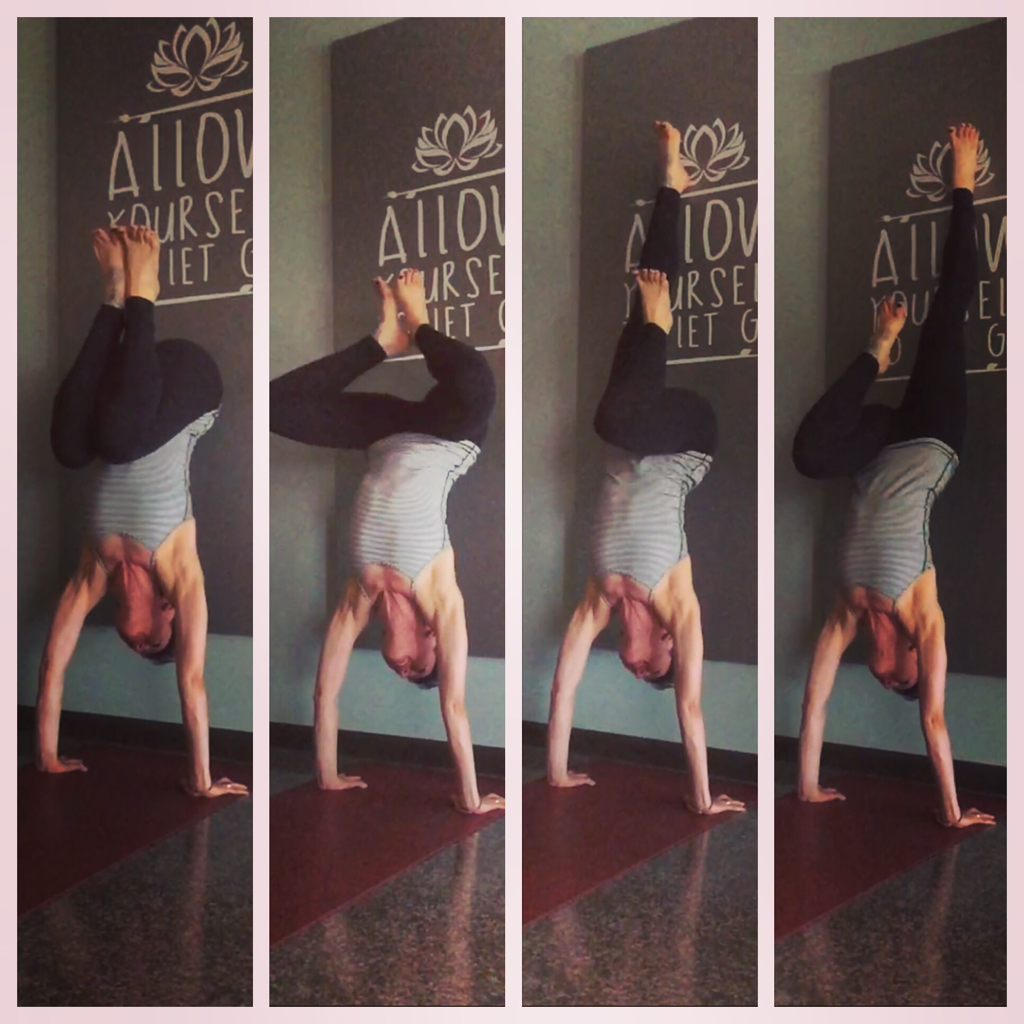 Place hands shoulder distance from each other and about 6 inches away from the wall.
Breathe! 30 seconds hopping up in a tuck. 60 second time out in child's pose. 30 seconds hopping with frog legs. 60 second time out in child's pose. 30 seconds kicking right leg/tucking left heal to butt. 60 second time out in child's pose. 30 seconds kicking left leg/tucking right heal to butt. Safety notes from our Lakewood, CO Yoga Studio: -make sure to warmup and stretch wrists prior. -make sure nothing is hanging from the wall above where you are kicking up. -take child's pose after being upside down so you don't pass out. -breathe. #handstand #handstands #armbalance #yoga #yogaeveryday #denver #denveryoga #yogadenver #CCYOGA #LakewoodCO Come learn more at our Lakewood, CO Yoga Studio! |